
Enlightening Your Move – How to Remove a Chandelier Safely
Posted in How-to on May 29, 2024
Are you puzzled about how to remove a chandelier without causing a spectacle? Our comprehensive guide will illuminate the process of DIY chandelier removal, making it a breeze. Whether you’re redecorating or relocating, our expert tips will ensure that the valuable piece is safely detached and ready for its new setting. Let’s light up your skills!
How to Remove a Chandelier Properly?
Learning how to take down a chandelier requires careful preparation and attention to detail.
Turn off the power to avoid any electrical hazards and assess how the chandelier is mounted to get insight into the best approach for disassembly.
Gathering the right tools and securing assistance are key steps to make sure the chandelier is supported adequately as you detach it.
The world's largest chandelier, "Reflective Flow," is 19 feet tall
Using proper packing tips for each component is essential to prevent damage during the move. Finally, adopting the correct loading techniques will help you relocate safely.
For high-value or complex chandeliers, professional cross-country movers can provide you with top-notch packing and long-distance moving services.
Ready to move with us?
Get A Free Quote
Prepare for Removing a Chandelier Before Moving Across the Country
Before diving into the task of chandelier removal, prioritizing safety is crucial. Start by ensuring that all electrical power is completely turned off to avoid any hazards. Collect all necessary tools and safety equipment, such as a sturdy ladder that reaches the ceiling comfortably, wire cutters, screwdrivers, and protective gear like gloves and goggles.
Properly planning the relocation and also preparing for the movers’ arrival can greatly diminish the risks associated with moving. Having everything organized and ready is the prerequisite for a smooth and safe process.

Take Precautions – Turn Off the Power
Completely cut the electrical supply by turning off the power at the circuit breaker. This is more complicated than simply deactivating the switch at the wall. The power source should be entirely disconnected.
Electrical safety is of utmost importance, and you should eliminate any risk of electrical shock. Once the power is turned off, using a voltage tester to verify that no current is reaching the light fixture is a prudent practice.

Examine How the Chandelier Is Mounted
After making sure that the power is safely turned off, the next essential step in preparing for a successful long-distance move is to carefully examine the chandelier’s mounting. The installation method may differ based on the fixture’s size, design, and the structural elements of the ceiling, often involving brackets, chains, or rods.
A thorough inspection of how the fixture is attached is crucial to identify the necessary tools, such as screwdrivers, pliers, and wrenches, and determine if additional support is needed for safely detaching it. This careful approach ensures a smooth and secure handling process of a large item.

Devise a plan, then prepare to begin dismantling the chandelier
Collect Needed Materials and Tools
Gathering the correct tools and materials before beginning the removal process is crucial for ensuring that everything proceeds smoothly. Having the right equipment on hand not only allows for the chandelier’s disassembly but also keeps it well-protected. Proper gear can also significantly enhance the efficiency of the process. Essential tools and materials include:
- Pliers – Needle-nose for wires and standard for loosening nuts or bolts.
- Screwdrivers – A set including both flathead and Phillips head for removing screws.
- Adjustable wrench – Useful for loosening any bolts or nuts securing the fixture.
- Wire cutters – For cleanly cutting through electrical wires.
- Ladder – Sturdy and tall enough to allow comfortable reach without stretching.
- Voltage tester – To confirm the absence of electrical current before beginning work.
- Protective gear – Safety goggles and gloves to protect against potential hazards.
- Packing materials – Bubble wrap and soft paper to protect delicate parts, sturdy boxes that fit the fixture snugly, packing peanuts or foam for cushioning, and strong packing tape for securing the box.
Get Appropriate Packaging Materials Online or in Supply Stores
When it comes to obtaining the right packaging materials for securing a lighting fixture, there are several convenient options available. You can purchase different packing materials online through popular retail websites or directly from supply stores. Each of these sources offers a variety of materials, including bubble wrap, sturdy boxes, packing peanuts, and high-quality tape that are essential for protecting delicate items.
Additionally, platforms like Craigslist can be an unexpected resource for finding affordable or even free relocation supplies. People often list leftover materials from their own moves, which can help you save on costs while still securing the necessary items to protect your fixture.

The best news is that the majority of packaging materials on Craigslist website are free
Follow Our Step-By-Step Chandelier Removal Instructions
The procedure for dismantling chandeliers is detailed and demands a systematic and precise method. Each phase, from enlisting the necessary help to gently lowering the fixture, is crucial in protecting both the participants and the chandelier. Adhere to these steps so that every aspect of the removal process is handled with care, minimizing the risk of damage or injury.
Gather the Right Team to Help Out
Assembling the right team is crucial when preparing to remove an item so large and complex. Make sure that the team includes an assistant whose presence is invaluable not only for managing the chandelier’s weight but also for aiding with tasks such as handling tools and maintaining ladder stability.
This collaboration is essential to avoid injury or any relocation mistakes that might occur from handling such delicate tasks solo. Having additional hands can provide the necessary support to stabilize the fixture during detachment and help in navigating the complexities of the disassembly. Tips for a successful team effort include clear communication, assigning specific roles, and practicing the steps before actual removal to synchronize team actions.
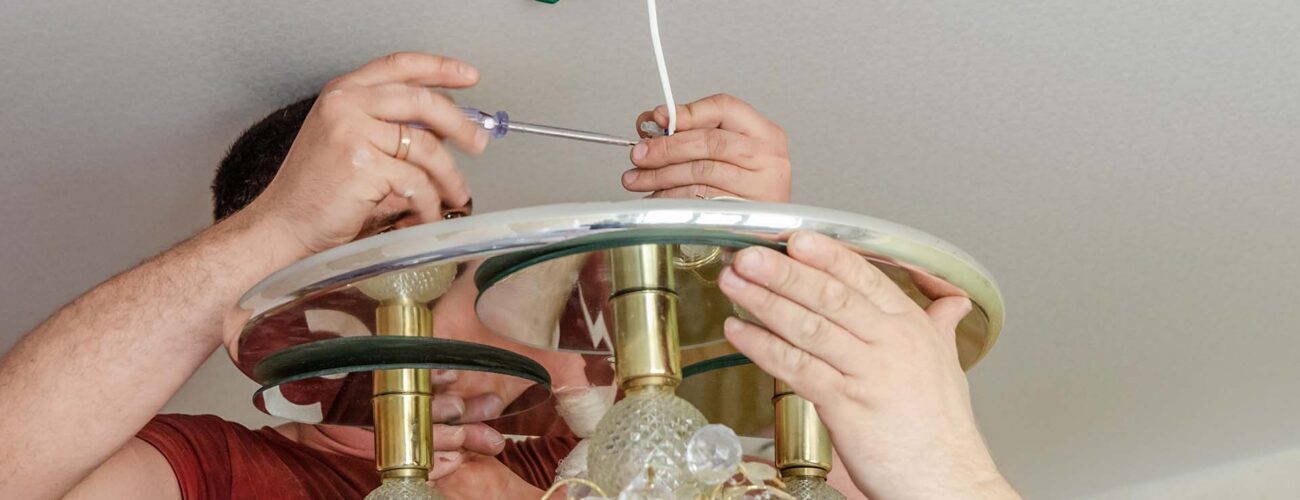
Detach and Lower the Chandelier
Detaching and lowering a chandelier is a critical task that tops the to-do list when relocating such delicate fixtures. Start by removing any parts that can be detached easily to reduce the overall weight. A sturdy ladder is essential, as is having an assistant to stabilize the fixture during this sensitive phase.
One person should focus on steadying the structure while the other carefully disconnects the electrical connections and unscrews the mounting hardware. As you lower it, constant communication between the team members is vital to coordinate movements and prevent any abrupt drops or swings.
Carefully Disassemble the Structure
Dismantling the chandelier’s structure necessitates a methodical approach to keep its intricate components safe. This process entails close attention to detail to prevent any components from being damaged. Handle each part delicately, using caution to avoid any potential breakage.
Additionally, label each component or take photographs before disassembly to simplify the reassembly process and help avoid confusion later. Efficient organization and gentle handling are key to successfully disassembling the structure.
Wrap and Pack Each Component
Prepare for relocating to a new home by using the right packaging techniques. Pack efficiently, beginning with wrapping each piece individually using soft paper or bubble wrap. If you’re using tape, avoid direct contact between the item and the tape to prevent residue remains. Bubble wrap provides excellent cushioning, especially for larger parts, safeguarding against bending or breakage.
For added protection, double-wrap delicate or sharp-edged parts. As you pack, prioritize placing heavier items at the box’s bottom and fill any gaps with additional padding to prevent movement. If you’re unsure about how to pack a chandelier for moving, following these steps diligently can help manage the safe transport of each component.
Hire Long Distance Movers to Load and Transport the Chandelier
When hiring movers to handle the transportation of the valued possessions, choose a relocation company that specializes in delicate items and offers professional moving and packing services. Start by researching reputable long-distance movers through online platforms and customer reviews. Request quotes from multiple companies and compare prices of long distance moving services.
Each quote should include detailed information about the services offered. Prioritize companies with positive reviews and a history of reliable service, such as Cross Country Movers, to ensure the safe and secure transport of the valuable chandelier.

Research a Reputable Long-Distance Moving Company
Start by checking the Better Business Bureau website to see if the relocation company has any complaints or unresolved issues. Additionally, verify the company’s USDOT number, which is required for all licensed interstate movers. This number allows you to check the company’s safety record and operating status.
Take the time to read customer reviews and testimonials to gauge the company’s reputation and reliability. Conduct thorough research and due diligence, and find a reputable cross-country moving services that will handle your possessions with care and professionalism.

As of 2023, there are about 16,800 moving companies in the United States
Reinstalling the Chandelier in Your New Home
Identify the appropriate location for the fixture, taking into account factors such as ceiling height, room size, and aesthetic appeal. Before installation, double-check that the electrical wiring is compatible and meets safety standards. If necessary, hire a qualified electrician to make any adjustments or upgrades.
Next, assemble the necessary tools and equipment, including a sturdy ladder, screwdrivers, and electrical testers. Ask a friend or family member to assist with the installation, making sure that the chandelier is properly supported while you make the necessary connections. Once installed, test it to make sure it is functioning correctly before completing any final adjustments.
Contact Us for Best Relocation Services
When it comes to safely relocating delicate items like chandeliers, meticulous planning and expert handling are important. From taking down a chandelier with precision to preparing it for relocation, Cross Country Movers guarantees a seamless and stress-free relocation experience. Contact us today for the best relocation services, where our team of professionals will handle every aspect of your move with expertise. Let us make your relocation journey smooth and worry-free.
Frequently Asked Questions About Removing a Chandelier
What Should I Do if the Chandelier Seems Too Heavy to Handle Alone?
If the chandelier seems too heavy to handle alone, it’s best to enlist the help of a friend or family member and then organize and plan a safe lifting and maneuvering without risk of injury or damage. Proper lifting techniques, such as using sturdy straps or lifting from the strongest points of the fixture, can also help distribute the weight more evenly.
How Can I Tell if My Ceiling Can Support the Weight of My Chandelier at the New Location?
To determine if the ceiling can support the weight of the structure at the new location, consult a professional contractor or structural engineer to assess the ceiling’s integrity. It’s recommended to make any necessary reinforcements.
Are There Any Specific Types of Boxes Recommended for Chandeliers?
When packing the chandelier for relocation, opt for sturdy, reinforced boxes specifically designed for fragile items to provide maximum protection against damage during transit.
How Do I Manage the Reinstallation if the Ceiling Height Differs From the Original Location?
If the ceiling height differs from the original location during reinstallation, carefully measure and plan adjustments. Proper placement and alignment of the chandelier are required for both aesthetic and safety reasons. Additionally, consult a professional electrician or contractor to assist with any necessary modifications to ensure the chandelier hangs securely and functions properly in its new environment.
What Are Common Mistakes to Avoid When Removing a Chandelier?
Common mistakes to avoid when removing chandeliers include neglecting to turn off the power supply, insufficient support during disassembly, and inadequate padding or protection during packaging to prevent damage to delicate components.