
March to Your New Home – Mastering How to Pack Drums for Moving
Posted in How-to on April 19, 2024
If you are a drummer, well, you are perfectly aware of how much your instrument costs and the maintenance it truly needs. So, how to pack drums for moving across the country and avoid damaging its components? Worry not! We curated some expert tips to help you relocate as easily as a sweet fill across the toms. Let’s get rolling!
How to Pack Drums for Moving
Moving drums requires attention to detail and an understanding of the components that make up the kit. Proper planning and a secure drum-moving strategy will ensure that each part is protected during transit.
Utilizing professional drum transport solutions can mitigate some of these mistakes and risks of DIY relocation. Preparing for a relocation involves cleaning and disassembling the kit, which is crucial for safe transport.
Quality supplies play a central role in this process, providing the necessary protection for each component. Following curated steps for the entire kit will help with protecting drums during a move. Loading everything onto the relocation truck correctly prevents shifts and falls, highlighting the importance of hiring professional long-distance movers to ensure the safety of this instrument.
Once at the new location, finding the perfect spot for the music room allows for safe unpacking and reassembly of the kit. Post-move, maintaining the drums is crucial for preserving their quality and sound. Last but not least, to make this long-distance moving journey a drum-rolling success, book a drum kit moving company on time.
Catching the Beat – Why Knowing How to Pack a Drum Properly Matters
Understanding the importance of an efficient boxing-up process can’t be overstated. It’s about more than just avoiding scratches. The journey to a new home poses significant risks to this instrument if they’re not packed correctly. Improper packing can lead to tension damage on skins, warping of shells, and scratches or dents on hardware and cymbals, compromising their integrity and sound. These potential damages underscore the importance of hiring professional movers.
Cross Country Movers come into play here. We offer expertise that significantly reduces stress and the risk of damage. Our experience and knowledge ensure that the kit reaches you in perfect condition, ready to provide those Cathay rhythms.

Setting the Tempo – Preparing to Pack Drums for Shipping
Preparation is key when it comes to boxing up belongings for shipping. Begin with a thorough cleaning of the drums to remove any dust and grime. This will protect their surfaces and keep the mold at bay.
The next step is disassembling the drum set for moving. This reduces tension across its surfaces during transport, minimizing the risk of damage. It’s also important to ensure that everything is ready to be securely packed with the right supplies.
Quality Packing Materials Are the Heartbeat of This Journey
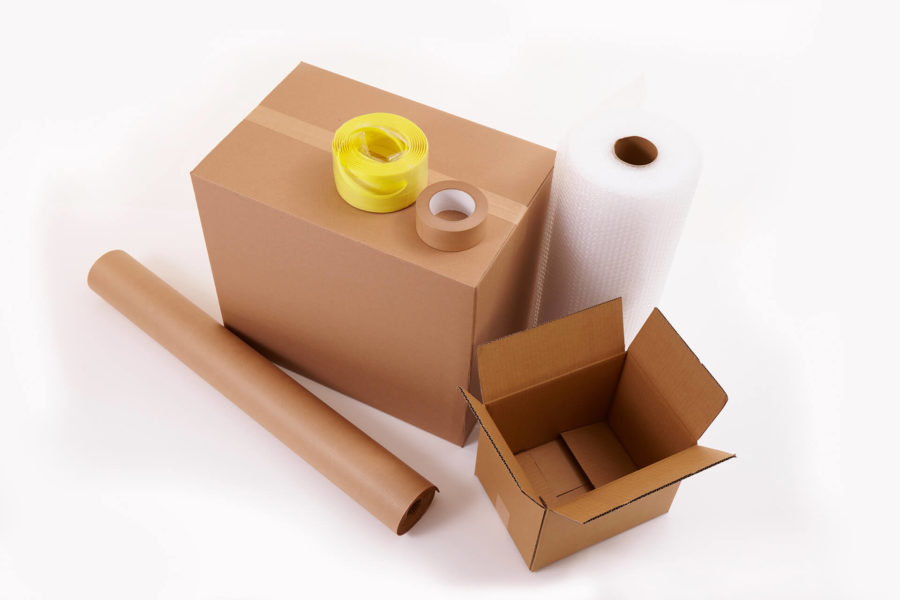
Choosing high-quality packing materials is essential for safe transport. These supplies provide the foundation for protecting each component of your kit. Here’s a list of different packing materials and accessories that will ensure an efficient relocation process:
- Sturdy boxes – get various box sizes to accommodate different parts of the kit.
- Bubble wrap – for wrapping and protecting individual components.
- Duct tape – high-quality tape to secure bubble wrap and boxes.
- Drum cases – hard and soft cases are specifically designed to provide extra protection. If your cases are made from soft materials, consider putting the packed components inside a crate with ample padding.
- Foam padding and peanuts – to fill empty spaces inside boxes and cases, providing cushioning.
- Stretch wrap – to secure bubble-wrapped components and prevent moisture.
- Moving blankets – for additional protection against bumps and scratches during transport.
- Marker pens – to label boxes with contents and handling instructions.
- Silica gel packets – control humidity and prevent moisture damage inside the packaging.

Rhythm and Moves – The Step-By-Step Drum Packing Guide
Ensuring the safety of your musical equipment during transit is pivotal. By following a structured approach, you protect the instruments from physical damage and preserve the sound quality and longevity. This guide highlights the essentials of securely boxing up the entire set, guaranteeing a harmonious setup at your destination.
The Bass Drum Is the Foundation of Your Instrument
The bass drum, being the cornerstone, requires careful attention. Start by loosening the tension rods and securing the drumhead. Wrap the shell in bubble wrap, ensuring all surfaces are covered. Place it in a box with foam padding at the bottom, adding more around the sides for snug support. Secure the box with strong tape and label it as fragile.
Keep the Beat Safe by Safeguarding the Snare Drum and Toms
For the snare and toms, the process mirrors that of the bass. Dismantle each piece, focusing on protecting the rims, snares, and heads with wrap. Utilize smaller boxes for these components, cushioning the bottom and filling gaps with foam or bubble wrap. Ensuring each piece is tightly packed will minimize movement and potential damage.
Don't Forget to Chime in Ample Cushioning Around Your Cymbals and Stands
Cymbals require layers of bubble wrap, secured with tape. Place them in designated bags or layered between cardboard sheets, then into a box with padding.
Stands, being metal, are less fragile but should be collapsed, wrapped, and bundled together to avoid scratches. Padding these ensures they don’t shift and harm other items and components.
Kick That Bass Pedals Back in Their Original ABS Case and Add Padding
Bass pedals should return to their original soft or hard case. Wrap each pedal in bubble wrap before placing it in the case, adding extra padding to fill any voids. This ensures no movement within, safeguarding against jostles that could affect calibration or cause damage.
Loading the Bandwagon – Safe Loading, Stacking, and Drum Kit Relocation Tips
When it’s time to load your musical gear into the relocation truck, strategic placement is key. Begin with the heaviest cases, typically those housing the bass and floor toms, positioning them on the truck floor for stability. Above these, you can stack lighter boxes, ensuring there’s no direct pressure on fragile items like cymbals and snare components.
Utilize moving blankets and additional padding between layers to prevent shifts and vibrations during transit. Instruments should be surrounded by softer items, such as bags filled with clothes or bedding, to provide extra cushioning. Lastly, securely fastening everything with straps helps maintain order, even on bumpy roads.

The Importance of Hiring Professional Musical Instruments Movers for Safe Drum Transport
Enlisting the expertise of professional movers who specialize in relocating valuable possessions is crucial for a seamless relocation. These experts understand the unique requirements and sensitivities of your gear, ensuring each piece is handled with the utmost care.
Cross Country Movers are more than happy to jam with you. Our comprehensive cross-country moving services are designed to meet your exact needs. With our professional packing services and custom crating solutions, you can rest assured that everything will be boxed up, loaded, and transported securely. Furthermore, we offer insurance options as an added layer of security for these valuables throughout the entire journey.
Find a Perfect Spot for a Music Room So You Can Unpack and Reassemble the Kit Safely
Choosing the right space for the music room is pivotal. Look for an area that allows for optimal sound quality, considering both acoustics and isolation. Soundproofing the room before the shipment arrives ensures that you can play without disturbances or disturbing others. Proper lighting is also essential, creating an ambiance that enhances creativity and focus.
Upon arrival, take the time to unpack and inspect each piece for any signs of transit damage. Carefully reassemble the kit and plan the setup, paying close attention to the placement for the best sound. Tuning and adjustments will be necessary after relocation, as changes in the environment can affect the instruments’ conditions. This careful setup process guarantees that your space is a sanctuary for musical exploration.

Encore! Maintaining Your Drums Post-Move Is a Must
After the move, maintaining your drums is crucial for preserving their sound and longevity. Polish the hardware to keep it shining and lubricate stands and pedals for smooth operation. Also, use cases and soft cloths to protect the skin from dust when not in use.
Pay special attention to the tuning key, protecting bass drum hoops, and ensuring drum shells and bearing edges are stored correctly. This care keeps the instrument sounding its best, ready for the next performance or practice and recording session.
Let Our Cross Country Movers Drum You Away
Relocating with drums doesn’t have to be a solo act. With the right preparation and care, you can ensure they march safely to their new home. Remember, the way you pack your kit reflects the rhythm you want to bring into the new space. However, now would be the right time to let the Cross Country Movers take the lead.
With our team holding the baton, you can rest assured that the pace of this relocation won’t have severe oscillations. We like to play precisely as a good old metronome! So, give us a call and let us do the heavy drumming in your place at least this once.
FAQ
How Can I Ensure My Drums Are Not Damaged During the Move?
To prevent damage during transit, ensure each piece is individually wrapped in protective materials like bubble wrap. Use sturdy, appropriately sized boxes for each component, and fill any empty spaces with padding materials to avoid movement. It’s also wise to disassemble parts that can be easily separated to reduce stress on the instrument.
How Should I Pack My Cymbals to Prevent Warping?
To protect your cymbals from warping, wrap each one separately in soft, cushioning materials. Place them in cymbal bags if you have them, or sandwich them between layers of cardboard inside a box, ensuring they do not press against each other. Avoid placing heavy items on top of the cymbals during transport.
Can I Pack and Move My Drums Without Professional Help?
While you can transport the instrument yourself, professional assistance is preferable. However, if you still want to DIY, follow these careful storing and transportation guidelines. Ensure you have gathered all necessary materials beforehand and take your time disassembling, wrapping, and boxing up each piece. Clearly label your boxes to make unpacking easier and to inform anyone helping with the move that those boxes contain delicate items.
How Do I Reassemble and Tune My Drums After the Move?
After relocating, reassembling and tuning the equipment with care is key to getting back to the best sound. Begin by methodically unpacking each piece and inspecting for possible transit damage. As you reassemble, follow any guides or instructions specific to your set, ensuring each drum is put back together correctly.
Tuning comes next, where patience is vital. Start with the bass drum, moving on to snares and toms, adjusting each drumhead to achieve the desired tone. This process might take time, especially in a new environment where humidity and temperature can affect the sound. Consider using a drum tuner or app for more precise tuning. This careful approach will help restore the full, rich sound of your set.


