
How to Pack Your Vacuum Cleaner When Moving Across the Country
Posted in How-to on January 18, 2024
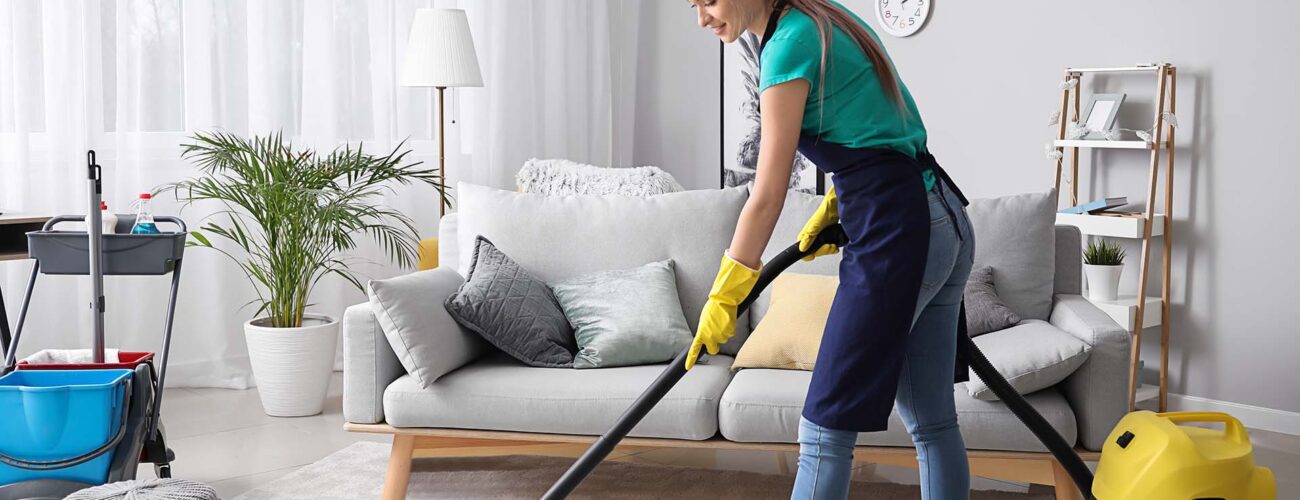
Packing your vacuums for a long-distance relocation requires careful consideration to ensure they arrive safely at your new home. In this guide, we will explore the best practices on how to pack your vacuum cleaner when moving across the country. From disassembling detachable parts to securing the main unit, we’ll cover all the necessary steps to protect your appliance during transit.
How to Pack Your Vacuum Cleaner When Moving?
When packing your vacuum for a relocation to a new state, start by cleaning and emptying the dust container or bag. Detach any removable parts like hoses and brushes, wrapping them separately in bubble wrap or packaging paper. Secure the main unit with bubble wrap, paying extra attention to fragile areas.
If you have the original box, use it – if not, find a sturdy box slightly larger than the appliance. Fill any gaps with foam peanuts or crumpled paper for added cushioning. Ensure the box is firmly sealed with packing tape, and clearly label it as fragile to prevent damage during shipping to another state.
Ready to move with us?
Get A Free Quote
Types of Vacuum Cleaners and Their Characteristics
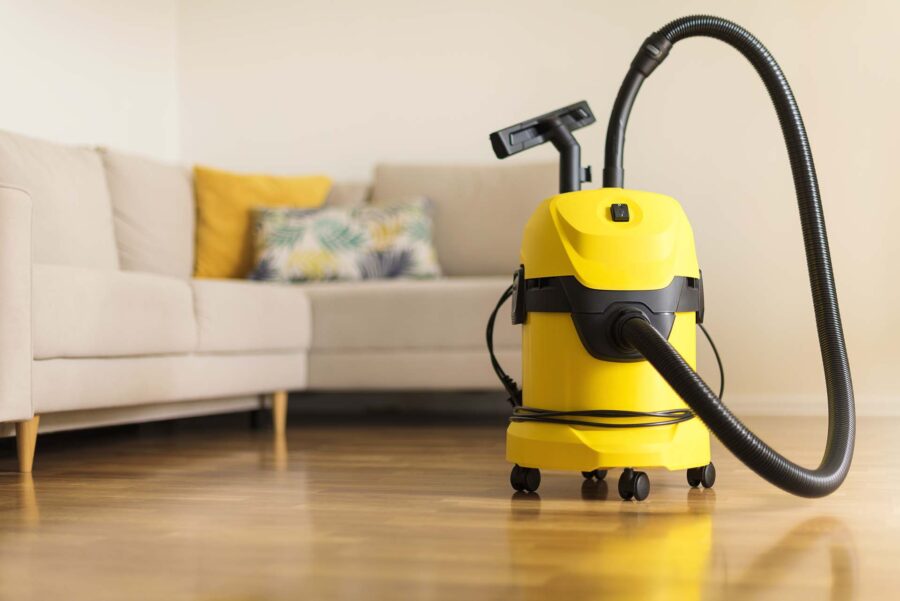
When planning a relocation, understanding how to pack a vacuum cleaner for cross-country moving is essential for safe transportation. Each type of cleaner has unique characteristics that require specific packing methods to ensure they are protected during shipping. Here’s a breakdown of various types and their specific packaging requirements:
- Upright vacuums – Known for their powerful suction and ease of storage, upright vacuums often have detachable hoses and accessories. When packaging, remove these attachments and wrap them individually.
- Canister vacuums – These come with a separate body and hose, offering flexibility. Disassemble the hose and wand and pack them alongside the main unit, each wrapped securely.
- Handheld vacuums – Compact and portable, handheld vacuums require minimal packaging. Wrap in a single layer of bubble wrap for protection.
- Stick vacuums – Slim and lightweight, these should be disassembled, if possible, with the main stick wrapped separately from the motor unit.
- Robot vacuums – These are often delicate, which is why it’s best to pack them in their original packaging if available or in a similar-sized box with ample cushioning.
Pre-Move Maintenance Checks You Should Perform
A proper maintenance check before the relocation to a new home is crucial. One of our best vacuum cleaner moving tips would be to begin by thoroughly cleaning the appliance, including the dust canister, filters, and brushes. Check for any loose parts or damages that might worsen during transit.
Ensure all attachments are accounted for and in good condition. Lubricate any moving parts if necessary, and make sure the cord is securely wrapped and fastened to the cleaner. This not only prepares it for relocation but also ensures it’s ready for immediate use at your new house.
Moving a vacuum cleaner is a complex process that requires a bit of preparation
What Are the Materials Needed for Safe Packing of Vacuum Cleaners?
Ensuring that cleaners are moved safely starts with the right packaging materials. High-quality bubble wrap is indispensable for wrapping the main body and detachable parts, providing cushioning and shock absorption. It’s a vital packaging material for protecting electronic appliances during moving. Durable packaging paper is great for wrapping smaller attachments and filling in gaps within the box.
Using sturdy boxes that closely match the size of your vacuum cleaner helps prevent unnecessary movement. Additionally, consider using foam padding or packaging peanuts for extra protection, especially around fragile parts. Lastly, strong tape is essential to seal the box.
Disassembling Your Vacuum Cleaner – Step-By-Step Disassembly Guide
Disassembling vacuum cleaners before a relocation to another state can minimize damage and save space. Start by unplugging the vacuum and emptying the dust container or bag. For upright models, detach the handle and any extendable wands. Remove the hose by gently twisting and pulling it away from the main unit. If your vacuum has a beater bar, use a screwdriver to remove it, being careful to keep track of the screws.
For canister vacuums, separate the main canister from the wand and head. Handheld or stick models generally have fewer parts, but ensure you remove any attached accessories. Always refer to the manufacturer’s manual for specific instructions, as disassembly can vary between brands and models.
It’s Time for Organizing and Labeling Parts
Keeping track of small parts like screws and attachments is crucial during disassembly. Use small, sealable bags for screws and label them according to the part they belong to. For larger attachments, wrap them in packaging paper and label them as well. If possible, take photos during the disassembly process to aid in reassembling appliances after the relocation.
Store all small parts and accessories together with the main unit, ensuring nothing gets lost or misplaced during shipping. Proper organization and labeling can greatly simplify the process of setting up your vacuum cleaner when you unpack after relocation.
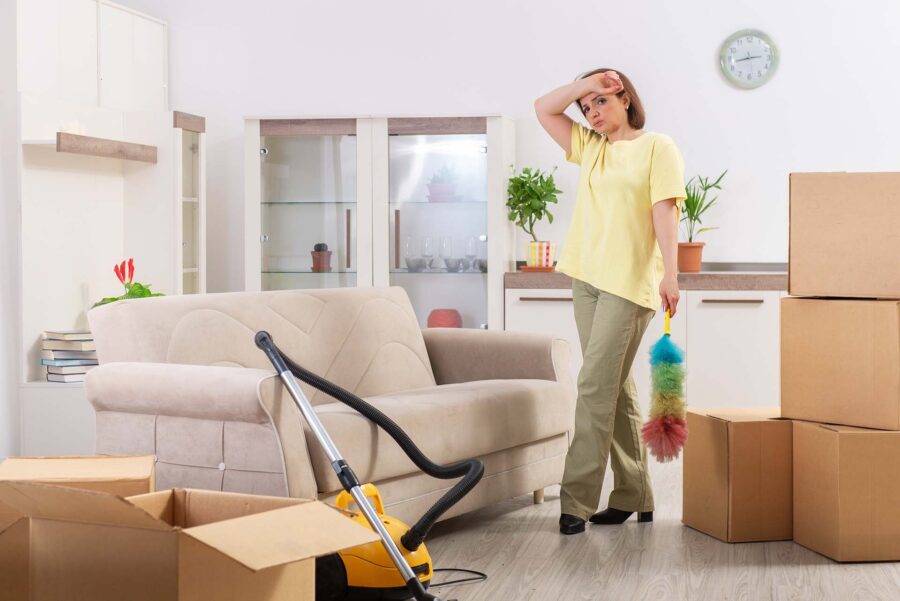
Not all models require disassembly - the manufacturer's manual will tell you if yours does
Packing and Securing Your Vacuum Cleaner
Packaging and securing your appliances properly is a crucial step in preparing for a relocation. Whether you have an upright, canister, or handheld model, each type requires specific care to ensure it arrives at your destination in the same condition it left.
Let’s dive into comprehensive instructions on how to wrap and cushion your vacuum cleaner, emphasizing the importance of protecting its various components during transport. From the main body to the smallest attachment, we’ll cover how to secure every part effectively for safe transport.
Wrapping and Cushioning Techniques You Should Keep in Mind
After cleaning and disassembly, it’s time to pack efficiently. Let’s take a look at some DIY packing strategies for home appliances. For upright models, secure the handle and base separately. Wrap the main body in bubble wrap, ensuring all sides are covered and cushioned.
For canister vacuums, wrap the canister and hose separately, using additional padding for delicate areas. If your vacuum cleaner has a HEPA filter, remove it and pack it separately to avoid damage. Secure all cords and attachments, wrapping them in soft packing material to prevent scratches and bends.
Pay special attention to fragile areas like the brush head and wheels. Utilize soft packaging materials to wrap smaller components and attachments. Ensure that every part is snugly wrapped and padded, preventing movement and friction that could cause damage.
How to Place the Vacuum Cleaner in a Box Correctly
Choose a sturdy moving box that can comfortably accommodate the appliance and its parts, allowing space for cushioning materials. Place the heaviest parts at the bottom of the box, adding a layer of bubble wrap or foam peanuts for a cushioned base. Arrange the wrapped parts inside, ensuring they fit snugly without excessive force.
Fill any gaps with crumpled packaging paper or foam peanuts to prevent shifting during transport. Seal the box with strong packing tape and label it clearly, indicating the contents and fragile nature. It’s usually best to just write “fragile items” on the box. Remember to keep the box upright, and consider marking the top side to ensure careful handling.
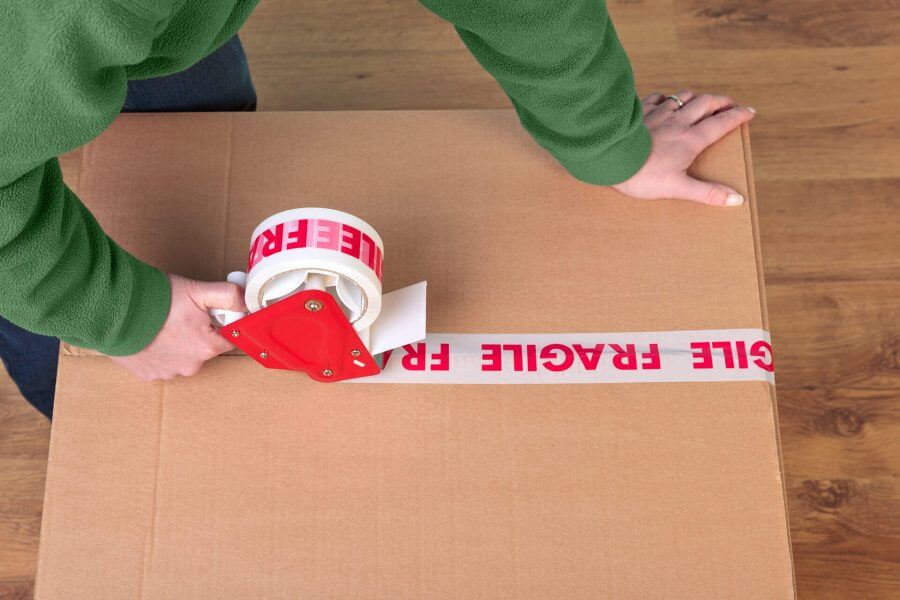
Packing appliances for relocation ends with labeling your boxes
Loading and Transporting Your Vacuum Cleaner
When loading and transporting your vacuums, careful placement in the relocation truck is crucial to prevent damage. Place the box containing the cleaner in a secure, stable spot in the truck, preferably between heavier, sturdier items that won’t shift during transit. It’s wise to avoid stacking heavy boxes on top of the vacuums to prevent crushing.
If possible, position the appliance upright, as this is often the most stable orientation. Ensure that there’s sufficient cushioning around the box, using soft items like blankets or pillows to absorb shocks and vibrations from the road. Lastly, avoid exposure to extreme temperatures or moisture, which could harm the components of the appliance.

It's important that the box with the appliance is correctly positioned in the truck
When Should You Hire Long-Distance Movers?
Deciding when to hire long-distance movers for professional packing services for appliances often depends on several key factors. If you’re moving a significant distance, especially across state lines, hiring movers can alleviate the stress of navigating unfamiliar routes and logistics. In this case, self-moving a vacuum cleaner is not recommended. Large items like appliances often require the expertise and equipment that movers provide.
Additionally, if time constraints are a concern, professional movers can expedite the process efficiently. Consider hiring movers if you have valuable or fragile items, as they have the expertise to ensure safe transport. Ultimately, the decision hinges on your relocation budget, the complexity of the relocation, and your personal comfort with handling the logistics yourself.

Why struggle on your own? Professional movers can help you relocate effortlessly
Contact Cross Country Movers – Let Our Expert Team Help You With Your Long-Distance Moving Journey
Embarking on a long-distance moving journey can be daunting, but with Cross Country Movers, you’re in expert hands. Our seasoned team specializes in cross-country relocations, ensuring your belongings are safely and efficiently transported. We offer professional moving services, utilizing the best techniques to safeguard your items.
Whether it’s delicate heirlooms or bulky furniture, our skilled crew handles every item with care. Choosing Cross Country Movers means peace of mind, knowing your relocation is managed by professionals. Don’t let the stress of moving overshadow your new beginning. Contact us today and experience a seamless, worry-free relocation.
How Should I Clean My Vacuum Cleaner Before Packing It for a Move?
To properly clean your vacuum cleaner before packing it for a move, start by emptying the dustbin or replacing the vacuum bag to remove all dirt and debris. Next, take out and wash or replace any filters according to the manufacturer’s instructions, letting them dry completely before reinstalling. Wipe down the vacuum’s exterior, hose, and attachments with a damp cloth to eliminate dust and buildup. Check for clogs or tangled hair in the brush roll and remove them carefully. A clean vacuum prevents odors, protects your belongings from dust, and ensures your appliance is ready to use as soon as you arrive at your new home.
Can I Pack My Vacuum Cleaner in Its Original Box for a Move?
Yes, packing your vacuum cleaner in its original box is the best option when moving, as it’s specifically designed to protect the appliance during transport. The box provides a snug fit for the vacuum and its parts, reducing movement and potential damage. If you still have the original foam inserts or protective packaging, use them to secure attachments and prevent shifting. For added safety, wrap the vacuum and accessories in bubble wrap or packing paper before sealing the box. Clearly label the box as “Fragile” or “Appliance” so movers know to handle it with care during your cross-country move.
What Should I Do if I Lose a Part of My Vacuum Cleaner During the Move?
If you lose a part of your vacuum cleaner during a move, start by checking all packing boxes, moving supplies, and vehicle compartments where small items might have shifted. Many vacuum attachments and components can easily get misplaced or mixed with other household items. If the missing part isn’t found, check the manufacturer’s website or contact customer service to order a replacement—most brands sell individual parts or kits. You can also look for compatible replacements from authorized retailers or online marketplaces. Keeping your vacuum model number handy will make finding the correct part faster and ensure your vacuum functions properly once you settle into your new home.
Is It Necessary to Disassemble My Vacuum Cleaner for Moving?
Yes, it’s usually best to partially disassemble your vacuum cleaner before moving to prevent damage and make packing easier. Remove detachable parts such as hoses, wands, brushes, and attachments, and wrap them individually in bubble wrap or packing paper. Unplug and secure the power cord with a twist tie or Velcro strap to avoid tangling. Keep all small pieces together in a labeled bag or box so nothing gets lost during transport. Leaving the main unit intact but separating delicate or protruding components helps ensure your vacuum arrives safely and ready to use in your new home.
How Can I Protect Fragile Parts of the Vacuum Cleaner During the Move?
To protect fragile parts of your vacuum cleaner during a move, wrap each detachable component securely in bubble wrap or thick packing paper. Focus on delicate pieces such as hoses, extension wands, and brush heads, which are more likely to crack or bend in transit. Use packing tape or rubber bands to keep the wrapping in place, but avoid over-tightening to prevent damage. Place smaller parts in a labeled box or resealable bag, and cushion them with soft materials like towels or foam inserts. Keeping these items separated and well-padded ensures they stay intact and ready for reassembly once you arrive at your new home.
Should I Empty the Vacuum Bag or Dustbin Before Moving?
Yes, always empty the vacuum bag or dustbin before moving to prevent dust, debris, or odors from spreading during transport. A full container can leak dirt and make your other items dirty while in transit. For bagged vacuums, replace the bag with a fresh one after cleaning. For bagless models, wash and dry the dustbin completely before reattaching it. A clean vacuum ensures hygiene and keeps the appliance ready for immediate use when you arrive.
Can I Move My Vacuum Cleaner Without Its Original Packaging?
Yes, you can move your vacuum cleaner without its original packaging, but it’s important to use protective materials to prevent damage. Wrap the vacuum and its attachments in thick bubble wrap or moving blankets for cushioning. Place the main unit in a sturdy box that fits snugly to avoid shifting. Fill empty spaces with towels or packing paper for added protection. Label the box clearly so movers handle it carefully and keep small parts together.
Should I Pack My Vacuum Cleaner Upright or Laying Down?
It’s best to pack your vacuum cleaner upright whenever possible, as this position helps prevent internal parts from shifting or breaking. Upright packing maintains the machine’s natural alignment and protects the motor housing. If the upright position doesn’t fit in the box, lay the vacuum flat and cushion it well with padding. Make sure the brush head and handle are supported to prevent bending. Always secure the box to avoid movement during the drive.
How Can I Save Space When Packing My Vacuum Cleaner?
You can save space by disassembling detachable parts of your vacuum and packing them separately around larger items. Remove hoses, wands, and attachments, then wrap them tightly in bubble wrap or towels. Store small pieces inside the dustbin or in a labeled plastic bag for easy access. If space allows, position the main body of the vacuum vertically in a corner of a large box or between soft items. Efficient packing keeps your vacuum safe without wasting valuable moving space.
Can I Safely Move a Cordless or Battery-Powered Vacuum Cleaner?
Yes, you can safely move a cordless or battery-powered vacuum cleaner by removing the battery and packing both components properly. Always disconnect and store lithium batteries separately, following moving or shipping safety regulations—especially for long-distance or cross-country moves. Wrap the vacuum and battery in bubble wrap or soft cloths to protect them from impact and temperature changes. Keep the battery in a cool, dry place, away from heat or direct sunlight during transit. Taking these precautions helps prevent damage, ensures safety, and keeps your vacuum ready for use in your new home.
What’s the Best Way to Label My Vacuum Cleaner Box for Moving?
Label your vacuum cleaner box clearly with the words “Vacuum Cleaner – Fragile” and indicate which side should face up. This helps movers handle it properly and prevents accidental damage. Include a short note like “Contains Attachments” if you packed small parts or accessories inside. Using color-coded labels or stickers can also help identify which room it belongs to in your new home. Clear labeling saves time, prevents confusion, and ensures your vacuum is unpacked safely.
Can I Store My Vacuum Cleaner in a Storage Unit During a Move?
Yes, you can store your vacuum cleaner in a storage unit during a move as long as it’s clean, dry, and properly packed. Empty the dustbin, remove filters, and ensure all parts are moisture-free to prevent mold or odors. Wrap the unit in a plastic cover or moving blanket to protect it from dust and scratches. Store it upright in a cool, dry area away from heavy items. Taking these steps will keep your vacuum in good working condition until you’re ready to use it again.
How Do I Reassemble My Vacuum Cleaner After Moving?
To reassemble your vacuum cleaner after moving, refer to the user manual and carefully reconnect all parts in reverse order of disassembly. Attach hoses, wands, and filters securely, ensuring everything clicks into place properly. Double-check for loose or missing components before plugging it in. Wipe down the exterior and perform a quick test run to confirm everything works correctly. Taking a few minutes to reassemble it properly helps prevent mechanical issues later.
What Should I Do if My Vacuum Cleaner Doesn’t Work After the Move?
If your vacuum cleaner doesn’t work after the move, start by checking for simple issues like loose parts, a tripped circuit, or a disconnected cord. Ensure the dustbin or bag is properly installed and that no debris is blocking airflow. Inspect the hose and attachments for cracks or clogs that may affect suction. If the motor won’t start, test another outlet or contact the manufacturer for troubleshooting advice. Avoid forcing the vacuum to run—diagnose the issue safely to prevent further damage.